Left Window Area
The area to the left contains many windows where you do actions that affect your whole video catalog. To open or close these windows, look in the View menu.
Search
The Search window lets you filter your video collection by searching on video Content, Keywords, Cast, Archives, Extended properties, Scenes, and more. You view the result of a video search in the Video catalog window. You can view the result of a scene search in the Scene search result window.
You can read more about search in How to use the Search window
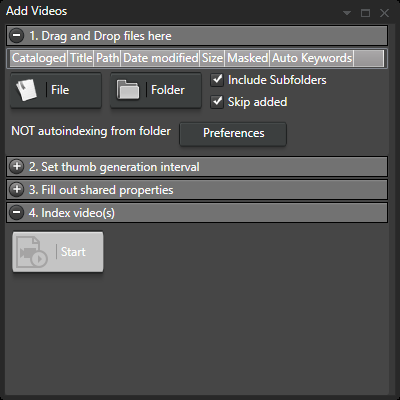
Add Videos
The Add Videos window helps you add new videos to your video catalog and monitor progress as videos are indexed.
Video Catalog
The Video Catalog window shows all videos in your video catalog. The selected video in the list is the selected active video. Important! The active video will determine what you see in many other windows. The purpose of the Video Catalog window is to provide you with an easy way to navigate and overview all your videos.
The Video Catalog window can show your videos in either Details view or Icon mode.
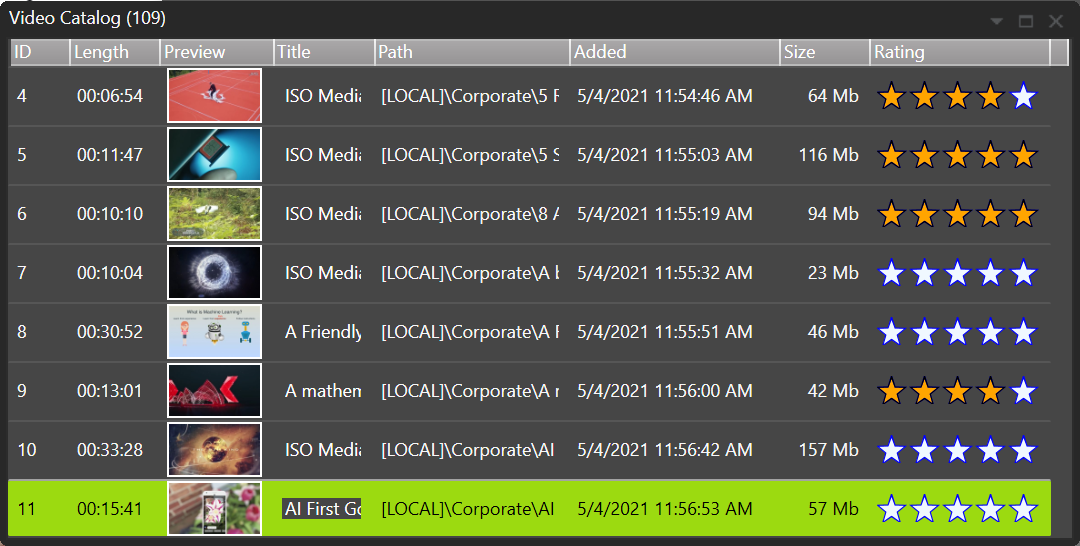
The Details View shows videos in your current video catalog represented by ID, Name, Preview image, Length, Path, Link, and exact time when you added the video to the video catalog.
You can change the columns' order by drag-'n'-drop and change the different columns' sizes, including the preview thumbs, by dragging the edge of the column header. Column widths are kept for the session, also when you switch layouts, and are saved with the layout. You can sort on any of the columns by clicking the column headers.
If you right-click the header column, you can edit the visible columns per layout. You can also add extended properties to your columns.
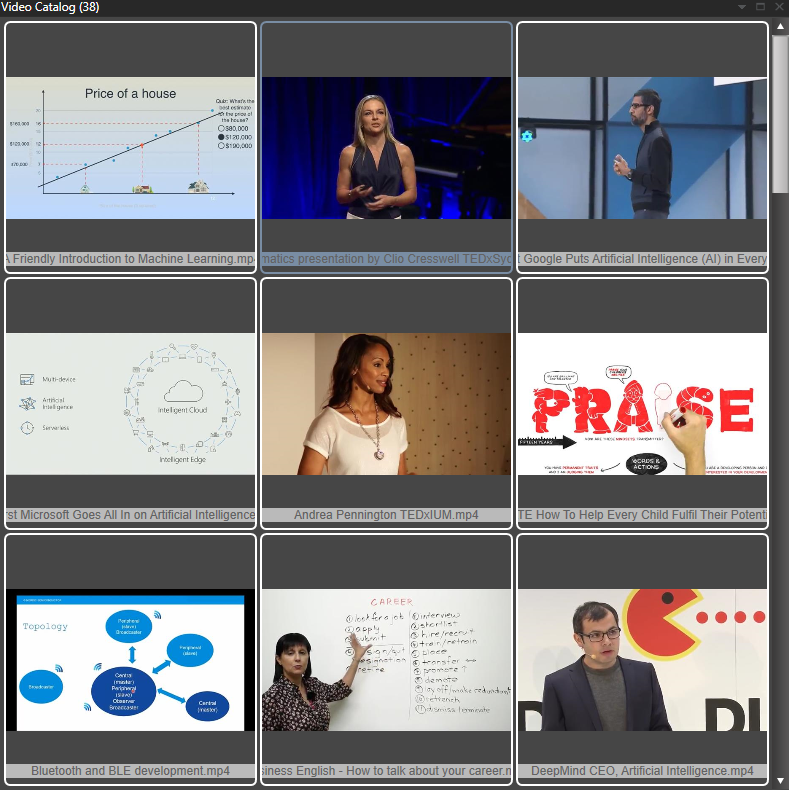
The Icon mode shows each video with the preview thumbnail and the title. You can select Small, Medium, Large, or Huge Icon mode.
To switch modes, right-click on a video and select Details, Small Icons, Medium Icons, or Large Icons in the View submenu. The current view mode is saved with the Layout and restored the next time you run the program.
Clicking a video brings forward the Video Scenes window. Double-clicking a video plays it from the time of the displayed thumbnail in the Video Player window.
Right-clicking invokes the context menu mentioned above, including the options to Copy, Paste, or Remove From the Catalog and an additional submenu item called File. Inside the File pop-out menu, you can play or Edit in an external player or editor. Delete the video file from the computer or open the folder where the video file is stored. Re-index will scan the video again for thumbnails and replace the current thumbnails with the new ones.
If you move the mouse over the image preview you scrub the thumbnails for the video. If you double-click when scrubbing the video you will start video playback from the time of the scrubbed thumbnail.
You can navigate the window with the cursor keys.
If you hold down CTRL you can select multiple video with mouse clicks.
If you hold down SHIFT and click you can mark a range of videos.
Using the keyboard you can navigate with the arrow keys and use Space to add or remove videos from the current selection. Use Enter to clear selection and only select the marked video.
Video Wall
In the Video Wall window, you view animated captured video frames from the current selection of videos. The video wall is the fastest way to scan through your videos. It behaves like the Attract Videos window but displays a selection of videos.
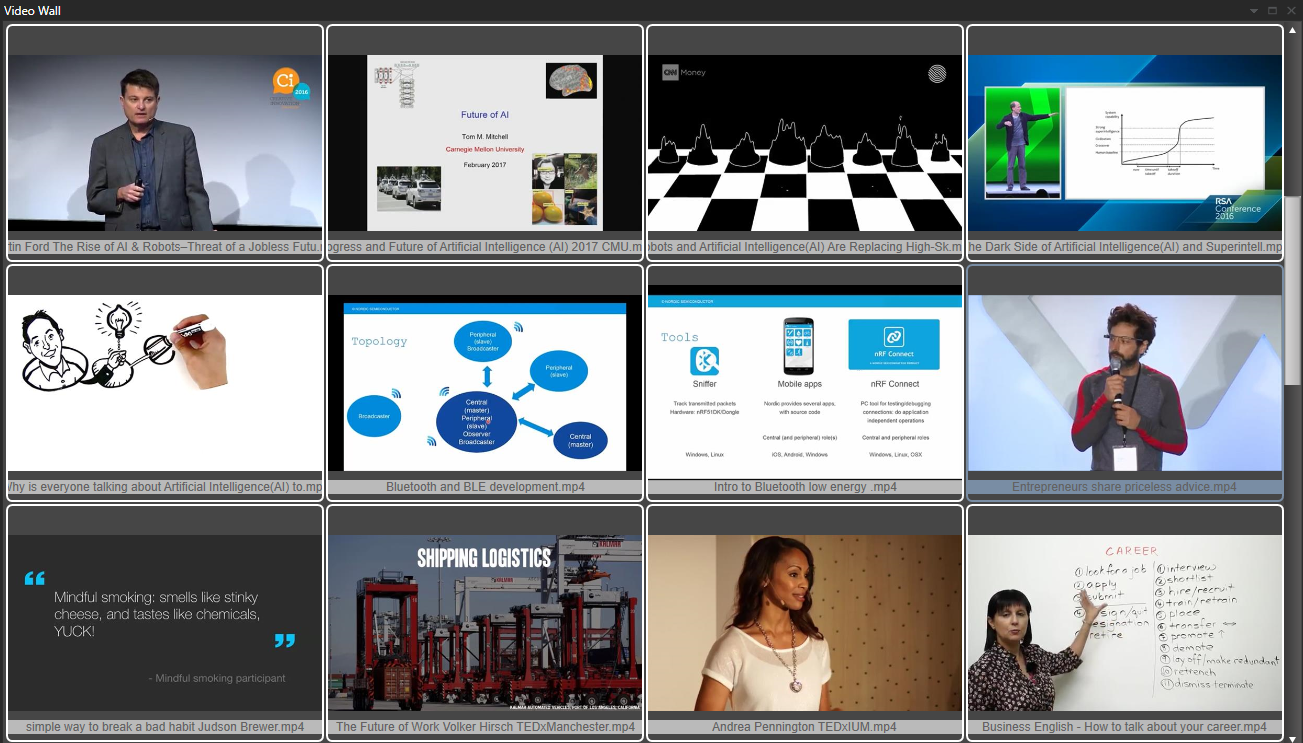
The videos displayed in the Video Wall are the ones you have in your current filter, i.e., the ones you see in the Video Catalog window (Ctrl+F to open the filter dialog).
The Video Wall is optimized for performance and uses several hardware threads. It will only animate the visible videos if the Window itself is visible.
Since the Video Wall is not playing the actual video files but instead the stored video frames from the video catalog, you should be able to play many videos simultaneously. You can also see Video Wall entries for video files that are not accessible.
However, if you have performance issues, you can improve performance by reducing the Window's size or increasing the Video Wall delay in Preferences.
If you are using a laptop on the battery, you might want to hide the Video Wall window (perhaps set up a laptop battery-saving layout). It does put a constant load on the system preventing it from ever saving power.
To switch between the different sizes of video frames, right-click on a video and select Small, Medium, Large, or Very Large in the View submenu.
The current view mode is saved with the layout.
You can select a video by right-clicking the icon and choosing "Select" from the context menu.
Double-click a video to play it in the Video Player window.
Bins
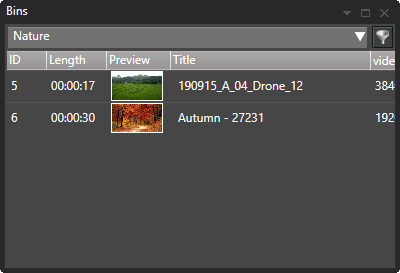
Bins are virtual folders that give you convenient access to your favorites or a list of videos relevant to a given project.
Videos in a Bin are not affected when you change search filters.
If you click on a video in a bin, the same video will be selected in the video catalog window, provided the video is not filtered out from a search.
Move videos to a bin using drag and drop from the video catalog window.
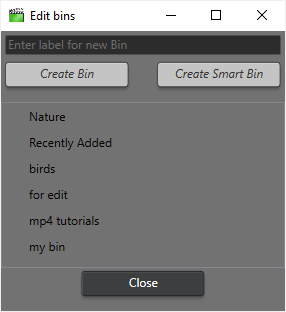
SmartBins are bins that are populated automatically by a search query.
Before creating a SmartBin you perform a search to find videos you want in the smartbin. When you create the SmartBin, it will remember the current search criteria. Whenever you add new videos to the catalog or change properties like a keyword, FVC will check to see if they match the criteria for the SmartBin and place them accordingly.
A SmartBin's criteria are its stored search query, and you can move that query between the bin and the Search window. In the Edit bins window, right-click a SmartBin: Search to Bin replaces the bin's query with whatever the Search window currently holds, and Bin To Search loads the bin's query into the Search window so you can see it, change it, and send it back with Search to Bin. An empty query matches every video, so a SmartBin created or updated while the Search window has no criteria set holds the whole catalog rather than nothing. SmartBins are marked (SmartBin) after their name, both in the bin drop-down and in the Edit bins window.
The Recently Added bin
Fast Video Cataloger keeps a bin called Recently Added so you can get straight to the videos you have just indexed. It is created for you the first time you add videos to a catalog, and every video you index goes into it as well as wherever else you put it.
It is emptied when you start adding videos again after a restart, so it holds what you have added since, not everything you have ever added. It is an ordinary bin rather than a SmartBin, so nothing is recalculated and you can drag videos in and out of it yourself.
You can delete it like any other bin if you do not want it — the videos in it stay in the catalog, and the bin is created again the next time you add videos.
The video bin window shows videos that are in the currently selected bin. Its title shows how many videos the bin holds.
Right-click videos in the bin for the same Index menu as in the Video Catalog window: reindex, transcribe, detect actors, classify scenes and remove thumbnails, applied to the selected videos. The menu is hidden while connected to a catalog server.
Clear Bin asks before it empties the bin. Hold Shift while choosing it to skip the question.
You select the current bin from the drop-down list at the top of the Bin window.
Click the button to the right of the drop-down to create and manage Bins.
Actors
The Actors window lists all actors in your video catalog. The filter function enables the easy finding of actors in extensive collections. You may create new actors and edit current actors. If you have a set of actors you wish to import from another catalog, click the Import button and follow the instructions.
File Organizer
The File Organizer window contains an integrated Windows File Explorer that you may use for any file operation you would otherwise use Windows Explorer. It would help if you used the integrated File Organizer because it is aware of your current video catalog.
-
When you drag a video from the Video Catalog window to a folder in the File Organizer window, your video catalog gets updated with the new file location.
-
When you drag a file from the File Organizer's own file list onto another folder in the window, the same happens: the file is moved, its catalog entry follows it, and the Move autotag from Preferences > File Organizer is applied.
-
When you delete a video file or companion image from within the File Organizer Window, it is also automatically removed from your video catalog.
-
When you drag a folder, it moves with its subfolders, and any of them the move leaves completely empty is removed for you, so organizing a collection does not leave a trail of empty folders behind. The folder you dragged items out of is never removed, and a folder that still holds any file or subfolder is always left untouched.
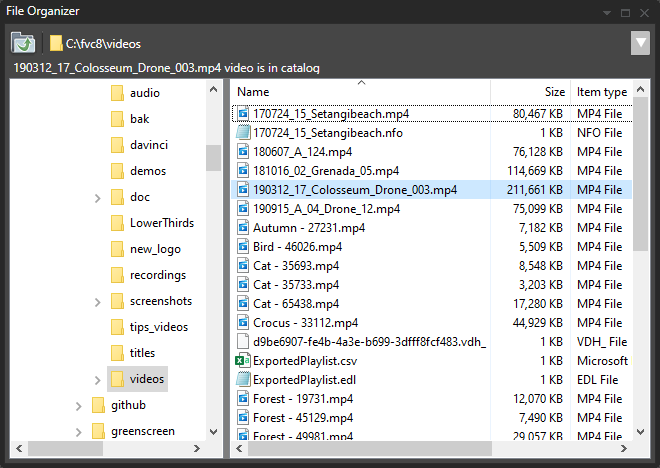
You can apply auto-tagging to videos as they are moved into folders to help you organize your files.
You can also select to have the videos hidden as they get auto-tagged.
When you use the automatic hiding of videos, it enables a workflow where you can manually file sort your video catalog by dragging videos one by one until there are no more visible video files in the list.
There is an option to; "always sync the file organizer", to show the folder of the video file you have selected. This option is especially useful if you have images in the video folder you want to use for companion images.
Between the folder view (left panel) and File view (right panel), a small splitter bar can be dragged left or right to change the folder's relative size and file views.
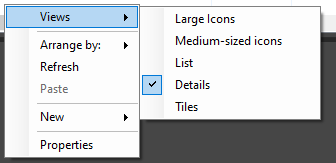
The files in the organizer can also be displayed as a list view, icon view, or thumb view. Change this setting by right-clicking outside any file in the file view and using the View pop-out from the context pop-up.
If you select a video in the file organizer that exist in your catalog it will be selected.
If you select a video that is not in your catalog, you will get an Add Video at the top of the window to start adding the video to your catalog, and a Play video button beside it. Select several files and Add Video adds all of them. The video is played automatically when you select it only if "Autoplay videos not in catalog" is ticked in the File Organizer preferences.
If you select an image that is a companion in your catalog the image will be loaded in the preview window.
If you select and image that is Not a companion you get an Add image button to add the image as a companion to the currently selected video. The image will be loaded in the preview window.
The buttons above the file list
Search searches your catalog for the videos stored in the folder shown in the address box, including the folders below it, and the result appears in the Video Catalog window. It does not highlight anything in the file list. To see your whole catalog again use Reset in the Search window, or Show all on the Video Catalog right-click menu. Tick "Filter catalog on folder" in the File Organizer preferences to run the same search whenever you pick a folder.
Add folder appears when you select a folder. It puts the videos in that folder, and in the folders below it, in the Add Videos window's list, skipping the ones already in your catalog. Nothing is indexed until you press Start there. It does not change what the Video Catalog window shows.
Select videos appears when you select several files. It selects those of them that are in your catalog in the Video Catalog window.
Select video appears when you select a companion image, and selects the video it belongs to.
Play audio appears when you select an audio file.
The keys belong to the file list: Delete deletes the selected files, and Ctrl+A selects them all. Deleting a video or companion image here removes it from your catalog as well.
Preview window
The preview window shows the currently selected companion image from the companion image browser window. You can zoom the image with the mouse wheel and pan around it, moving the mouse when you hold the left mouse button.
Playlist window
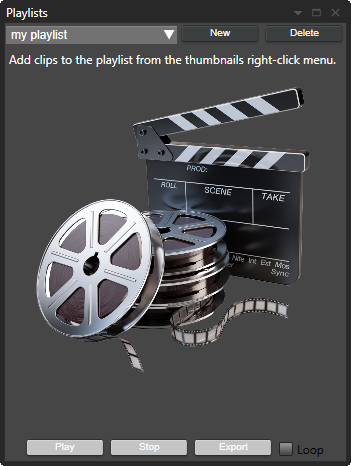
The playlist window shows the video playlists in your video catalog.
A video playlist is a list of segments from videos in your video catalog. You can play these playlists like a single video file, even though they are separate and might be of different sizes and codecs.
Playlists are stored inside the catalog file.
Note: Playing a Playlist requires a seek to the start of each segment. Therefore not all video formats are supported in playlists. The video format needs to support seeking. Seeking is supported for all modern file-formats, including mp4, but it might be problematic for older formats. Specifically, some versions of WMV files have a problem when using some of the video renderers. For wmv, we highly recommend the MadVR codec (needs to be downloaded and installed separately and can then be selected from the preferences.)
Create a new playlist by clicking the "New" button, typing a name for the playlist, and then clicking "Create".
Click "Delete" to remove the currently selected playlist.
Click "Export" to export your playlist as a CSV, XML, EDL, or MPV-EDL file for use in other software. Playlist files saved from Fast Video Cataloger can include the full path to the video file or just the filename. You can also select to copy all video files in a playlist to a new folder.
Playlist entries
Add a whole video as a clip to the current playlist by right-clicking the video and selecting "Add to playlist".
Add a clip to your playlist by right-clicking a video thumbnail and selecting "Add to playlist". The clip gets added from the time of the selected thumbnail to the next one. Hold down shift when you click "Add to playlist" to set the clip's duration to what you specify in preferences.
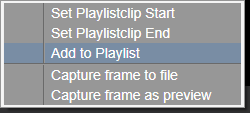
You can also add clips or adjust time by right-clicking the camera icon in the video player. When you use the camera icon menus, new frames will be added automatically to the video overview (Hold shift to prevent this). You can also assign shortcuts to update a clip's start and end times.
When you add clips to the playlist, they are inserted after the selected playlist entry or at the end if no item is selected. You can re-order clips in a playlist with drag and drop.
Playing
You use the buttons at the bottom of the playlist window to play the playlist. The replay of the video playlist happens in the video player. Note that if you stop the playlist in the video player window and then play it again from the video player, it will not continue the playlist; it will simply play the current video.
If you double-click a playlist entry, you start playing from that playlist entry.
Exporting
To export a playlist, click the Export button at the bottom of the window. The file name defaults to the playlist's name. Select the export format from the dropdown in the save dialog. You can export playlists as;
-
EDL, Edit Decision List (CMX 3600). It can be used to import timelines into many video editor programs. Note that we include the full path to the video and do not require a short filename as the spec requires. Most modern software, like OpenShot, can handle full paths.
-
XML, Final Cut Pro 7 XML version 5. It can be used to import timelines into many video editor programs like for example, DaVinci Resolve. Note that there is no validation during export to ensure the video format is supported. For example, import a wmv file into DaVinci, and you can get a "file not found" error as the format is not supported.
-
CSV, Comma separated list as a plain text file to be imported into tools like excel.