Keywords can be used to find scenes inside videos

Keywords can be used to find scenes inside videos

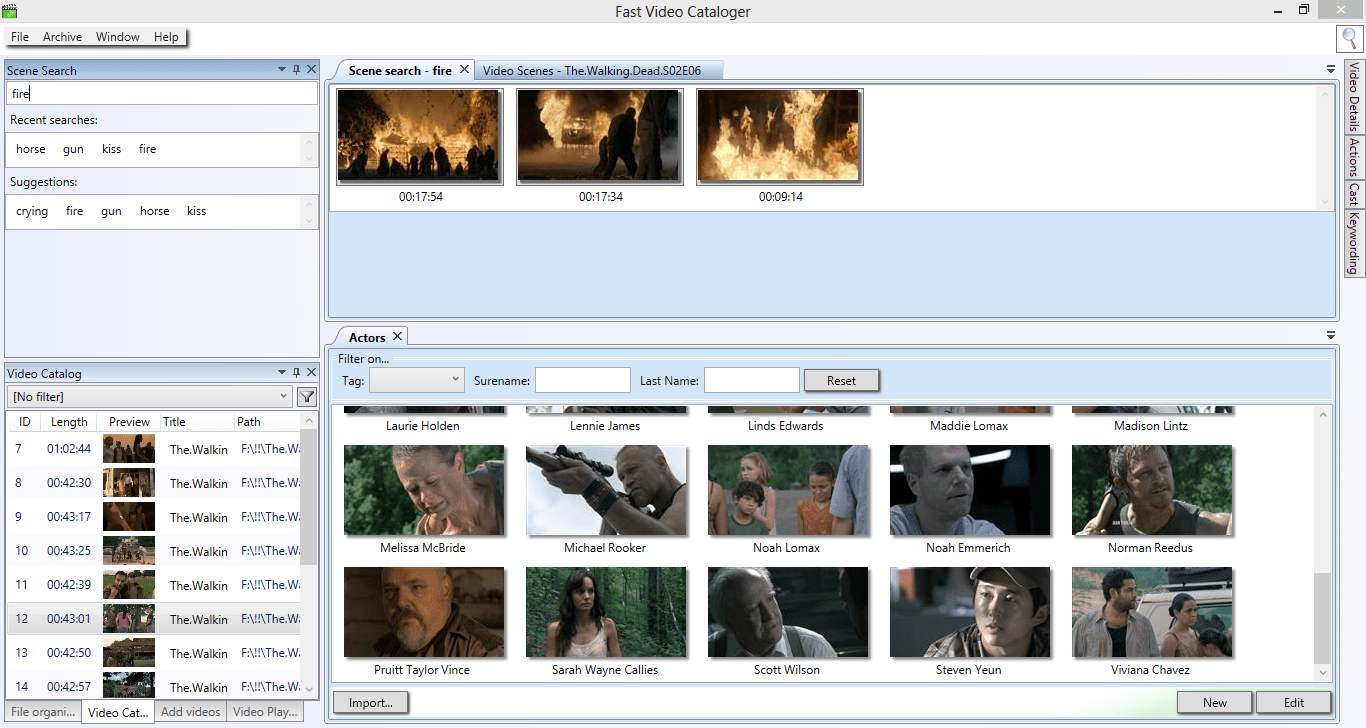
The Scene search window allows you to search for specific scenes in all of the videos in your catalog. The result shows up in the Scene Search Results window. This window is very similar to the common video scene window but it shows the video scenes that match searches you do. This window can contain video frames from different videos and you can still play each of them from the time of that scene.

This is useful if you want to view all scenes with keyword action or face in a collection of 200 audition videos.

How to add actors to your video clip in Fast Video Cataloger 2

How to add actors to your video clip in Fast Video Cataloger 2

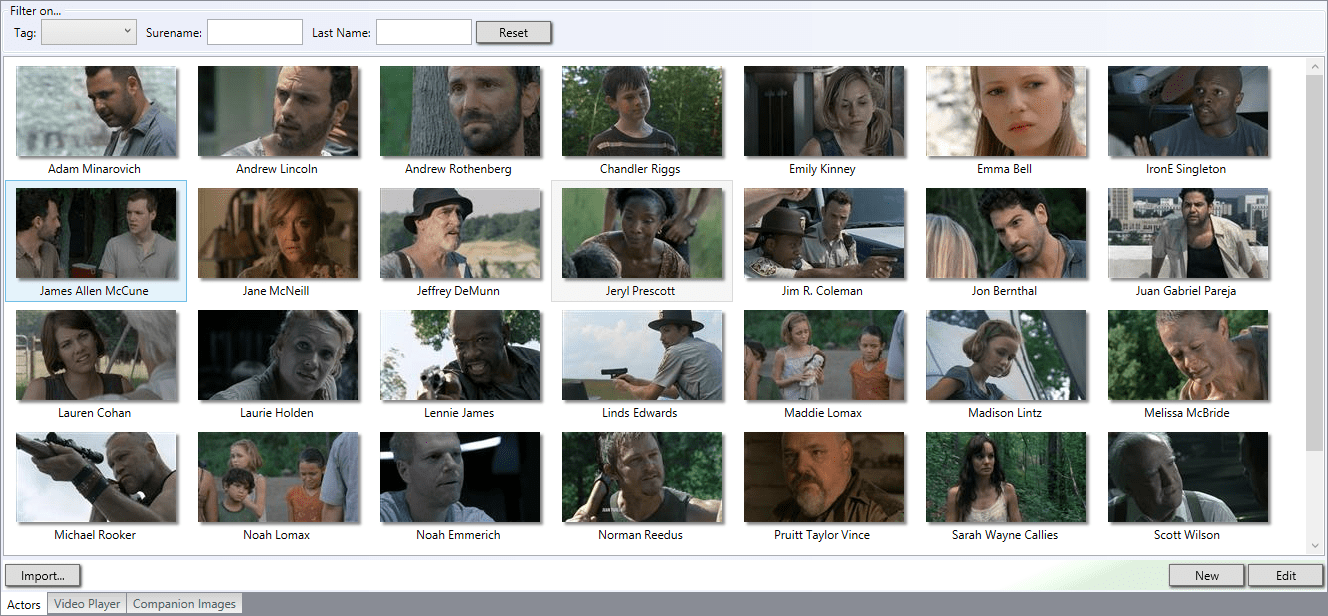
Adding actors to video is as simple as dragging an actor from the actors window to the cast window. The dragged actor will be set to all the selected videos in the “video catalog” window. Note that it is possible to select more than one video at a time.

  • Tip: A good layout when you adding actors to videos is to have the “video catalog” window to the left, then the “actors” window in the middle and to the right the “cast” window.
  • Tip: Add actors to multiple video clips at once by selecting more videos in the video catalog window. Select multiple videos in the video catalog list by holding the ctrl or shift key.
  • Tip: It is possible to add default actors at the time you are adding videos to your catalog.
How to use Companion images in Fast Video Cataloger 2

How to use Companion images in Fast Video Cataloger 2

Fast video cataloger is centered around videos. Each video can be tagged, annotated, associated with actors and now, with the release of Fast Video CAtaloger 2,  you can also add companion images.

Adding companion images

Companion images are automatically added when videos are added to your catalog by looking for image files in the same folder as the video. Companion images can be either normal images or cover images. Cover images are determined by some default filenames ( front, back, cover etc ).
Using the repair tool you can search videos you currently have to add companion images for them.

Viewing companion images

Companion images are displayed in the “companion image” window. The window will hold both the companion images and the covers. You can change how much of the window should be used for covers or companions.
The companion images will by default be shown one by one in a slideshow. Right-click the current image to set it as a front or back cover.
If you move the cursor over the lower part of the companion image window you will see a thumbnail list of all companion images. Click on any of the companion images to load it.

Companion image Slideshow

The companion images will by default be shown one by one in a slideshow. If you do not want the slideshow you can turn it off from the preferences. In the preferences you can also select how many seconds each of the companion images should be displayed and if the slideshow should select companion images in random order or display them in order.

Displaying cover images

Cover images, if the video has them, are displayed side by side in the upper part of the companion image window.
There can be two cover images per video. Right click on a cover image to remove it and right click on a companion image to set it as a cover.

  • Tips: Store your video files in a folder. If many companion images and videos are in the same folder there is no way for the program to know which companion image belongs to which video.
How to use a video scene to create an actor

How to use a video scene to create an actor

Right click on a video scene and select “Use image for new actor portrait”, this will create a new actor that will have that video scene image as portrait. You can also add new actors from the “new actors” dialog window. Open the “new actors” window by clicking the “new” button in the “actors” window or directly from the file/add actor menu.

Not dockable

The add actor dialog is one of the few windows in Fast video cataloger that is not dockable. The reason is that adding actors is something you might want to do with your normal browser window open. Having this window as a popup dialog makes it easier to create a working layout with your browser.

Adding extra data on an actor

Create a new actor by giving the actor a first and last name and write a description. Add tags to the actors, for example character or style, and select a portrait image for it. Portrait can be added by directly selecting a file, pasting from the clipboard or dragging and dropping from another program. When you are done adding an actor click “ok” to add the new actor to your catalog.

  • Tip: An actor does not need to be a person. Depending on your catalog it can be used as a richer tag with a description and an image. An actor can for example be a company, a product, a customer or a rock band.
  • Tip: Use drag n drop to add a portrait from a web browser. You can also drag a description text from a web page.
How to personalize your video workflow in Fast Video Cataloger 2

How to personalize your video workflow in Fast Video Cataloger 2

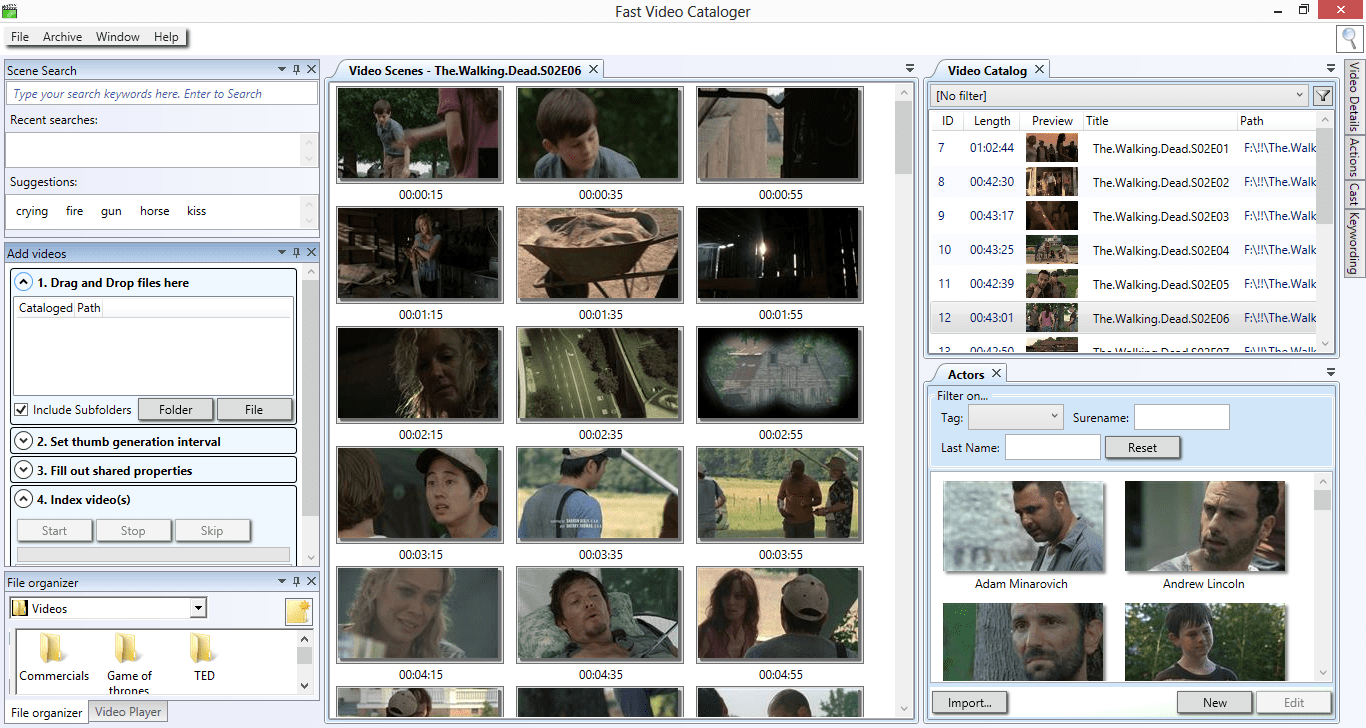
Fast video cataloger has a docking user interface. You can create your own ideal layout of the program and you can do it across multiple computer screens.
Your layout is automatically saved between runs of the program. You can also select to save a favorite layout to be able to restore to that layout later.

Arranging windows

To move a window in the layout move the mouse pointer to the header of the window and press and hold down the left mouse button. You will now see the docking user interface. Move the cursor to decide where to dock the window.

Hiding and showing windows

You can hide any window by clicking the x in the upper right corner of the window. To bring back closed windows go to the Window menu and select the window you want to open again. Note that the closed window will reappear in its default position not necessary where you had last moved it.

The docking menu

By clicking the triangle next to the close button for each window you bring up the docking menu.

Resetting layouts

You can at any time reset the programs layout to the default layout by selecting Window/Reset layout.

Loading and saving user layouts

You can at any point save your current user layout be selecting Window/Save user layout. To load your saved layout simply select Window/Load user layout. You can only have one user layout, and there is no need to select a filename for your layout, the program will take care of all that behind the scenes.

  • Tip: The best way to learn how the docking works is by simply playing around with dragging windows.
  • Tip: Hold down ctrl and press tab to get a list of all windows in your layout. Click on a file in the list to open that window.