My name if Fredrik Lönn and I am the author of the Fast video cataloger program.
I want to share how I go about setting up a new video catalog from scratch. I’ll also share some tips that will lead to you having a searchable and fast video thumbnail catalog of your own.
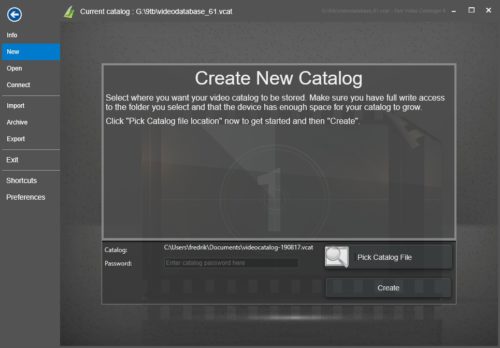
Create Catalog dialogue
Let’s get started.
Create a brand new catalog in Fast video cataloger by selecting Catalog / New.
First, you need to decide where to store your video catalog file. Click the pick catalog folder button.
You can store your catalog anywhere – it does not have to be together with your video clips and the catalog file can be moved to another location at any time.
The size of your catalog depends on a bunch of factors but expect your catalog to grow by approximately 1GB per 1000 videos you add. The catalog is not kept in memory, so you can have a catalog much larger than your computer’s memory.
I try to store my catalog on my fastest disk drive if possible an SSD disk or a local hard drive. Storing the catalog on a secondary device or a NAS drive is possible, but it will slow down the software. If you store it on a NAS drive, make sure to turn off automatic backups on the folder with the catalog file.
Then go and pick you catalog folder, name your catalog file and create the catalog.
Now you have an empty catalog. From this point onward, there is no need to save the catalog. Everything will be saved automatically whenever changes are made.
For your catalog to be interesting you obviously need videos. But before adding any, let us have a look at some important settings you should check before adding videos.
Open the Preferences dialog from the File menu and go to the Video indexer tab.
In the preferences you can decide how large thumbnails you want to capture from your videos, “Resize video-frame to be”.
I recommend you to keep the same size of all video thumbnails in your catalog.
And note that larger thumbs will take longer to create, load and they will make your catalog file larger.
I use 320×200 as the resolution for all my catalogs. 320 is half the size of a standard definition TV frame which I find to be a good compromise between size and the details you can see in the thumb.
Selecting a higher resolution than the video resolution is pointless; it’s better to use the built-in scaling instead.
Next, select the default interval you want between each captured video frames, “Capture video-frame after” and “Then capture every“. These values you can and probably should change per video batch you add to your catalog.
Too many thumbnails for a video file make it hard to get an “at a glance” overview while too far between thumbnails risk that you miss important events in the video.
I usually set this to 60s for the first frame and 30s between frames. I then add specific frames with key moments per video using the “Camera” button in the video player and the “Burst capture mode” (Right click on a video thumbnail frame).
Now we are done with the default preferences, click OK to close the dialog and let’s add videos to the catalog.
Click on the “Add videos” tab to start adding videos.
I recommend that you keep your video files on a slower USB or NAS drive, I have and use both.
The program will work at full speed regardless of where your video files are and personally I can find a better use for my main hard drive than storing large video files.
It is also good to have a place where I can store my videos with enough space so I don’t have to move them around later when I run out of space. If you happen to have your videos on an internal disk, don’t worry for now, we can sort that later.
When you add videos, you can just add your root video folder and the program will find all videos there. However, I recommend that you don’t do that, there is a better way.
You probably already have your videos ordered in some type of subfolder structure, based on genre, actors, date of videos or something else (do let me know).
Add videos from one subfolder at a time. Select a subfolder and when you have added that subfolder also set relevant keywords for all videos in that folder before clicking “start” to begin indexing.
Doing it this way takes a bit longer. You can prepare the next video folder as the previous ones are being added to the catalog. But, by doing it this way you also get basic searchable tags for your entire catalog, which is a great start to have a great searchable video catalog.
Now, go ahead and create your own catalog and if you have any feedback or tips to make this guide better, please let me know.